Vite原理解析
Vite原理解析
命令解析
在安装了 Vite 的项目中,可以在 npm scripts 中使用 vite 可执行文件,或者直接使用 npx vite 运行它。
下面是通过脚手架创建的 Vite 项目中默认的 npm scripts:
{
  "scripts": {
    "dev": "vite", // 启动开发服务器,别名:`vite dev`,`vite serve`
    "build": "vite build", // 为生产环境构建产物
    "preview": "vite preview" // 本地预览生产构建产物
  }
}
可以指定额外的命令行选项,如 --port 或 --open。
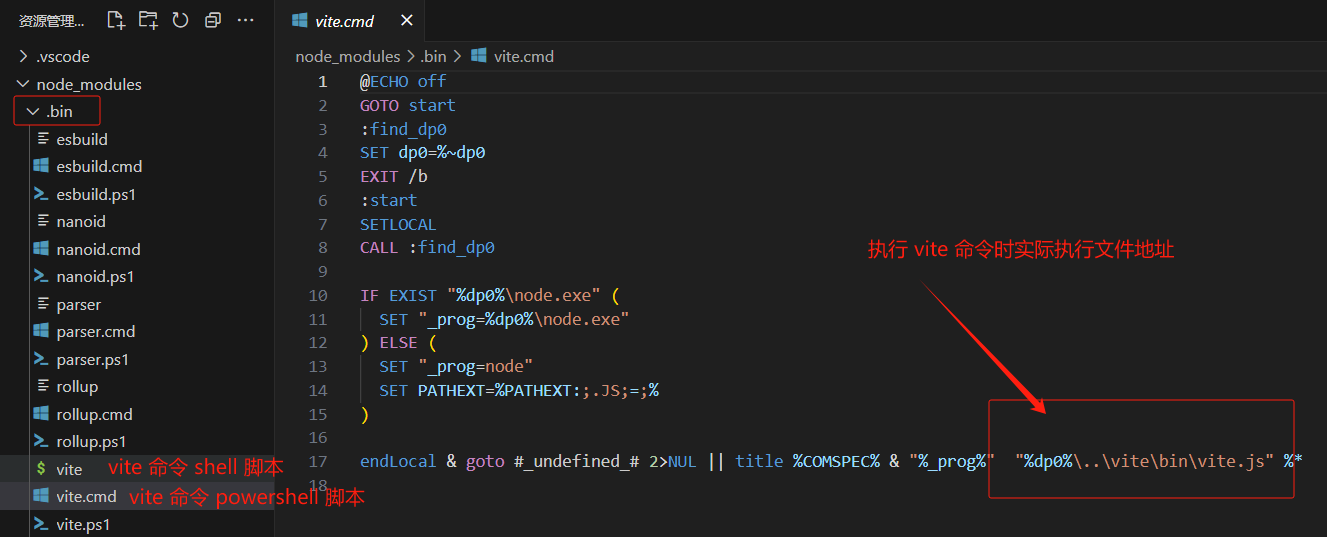
在 windows 或 shell 中执行 vite 命令时,cmd 或 shell 会在当前目录下的 ./node_modules/.bin/ 目录下查找脚本;
以下是在 windows 下 powershell 中执行脚本:
在 Linux 下 shell 脚本为:
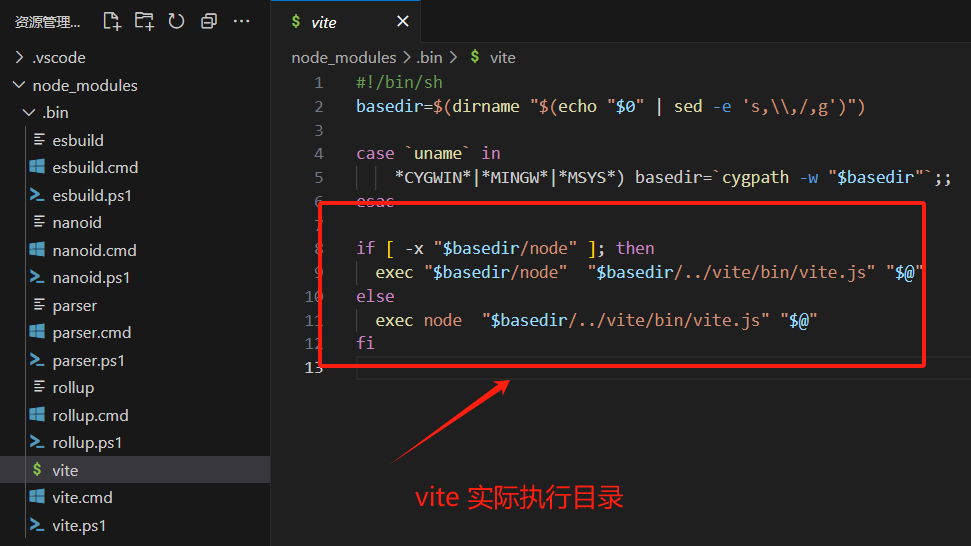
通过以上脚本,解析 vite 命令时,会在不同平台下加载对应 Shell 脚本, shell 中使用 node 执行 vite 脚本,vite 脚本位于 ./node_modules/vite/bin/vite.js 目录下:
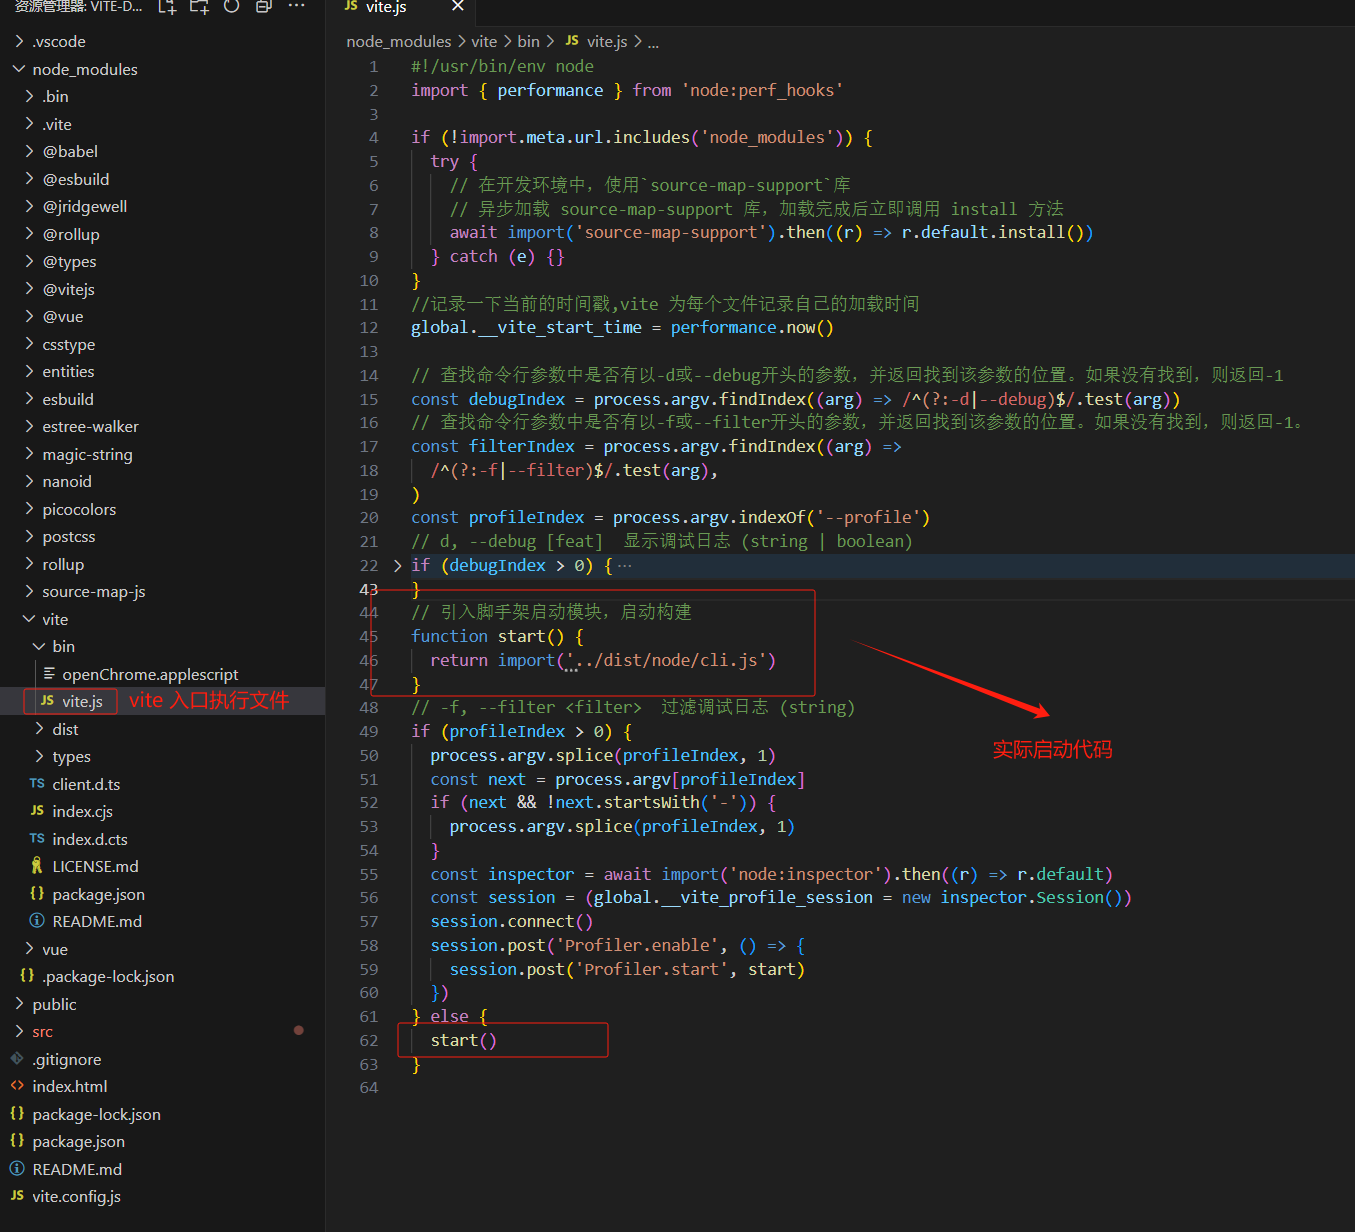
vite 入口文件主要执行以下逻辑:
- 解析命令参数;
- 引入脚手架文件,调用
start方法启动;
总结:
执行 vite 命令时:
- 首先调用平台的 shell 脚本解析命令,使用 node 执行 vite 入口文件;
- vite 入口文件首先解析命令参数,然后执行
start方法启动;
启动服务
在 ./node_modules/vite/dist/node/cli.js 文件中: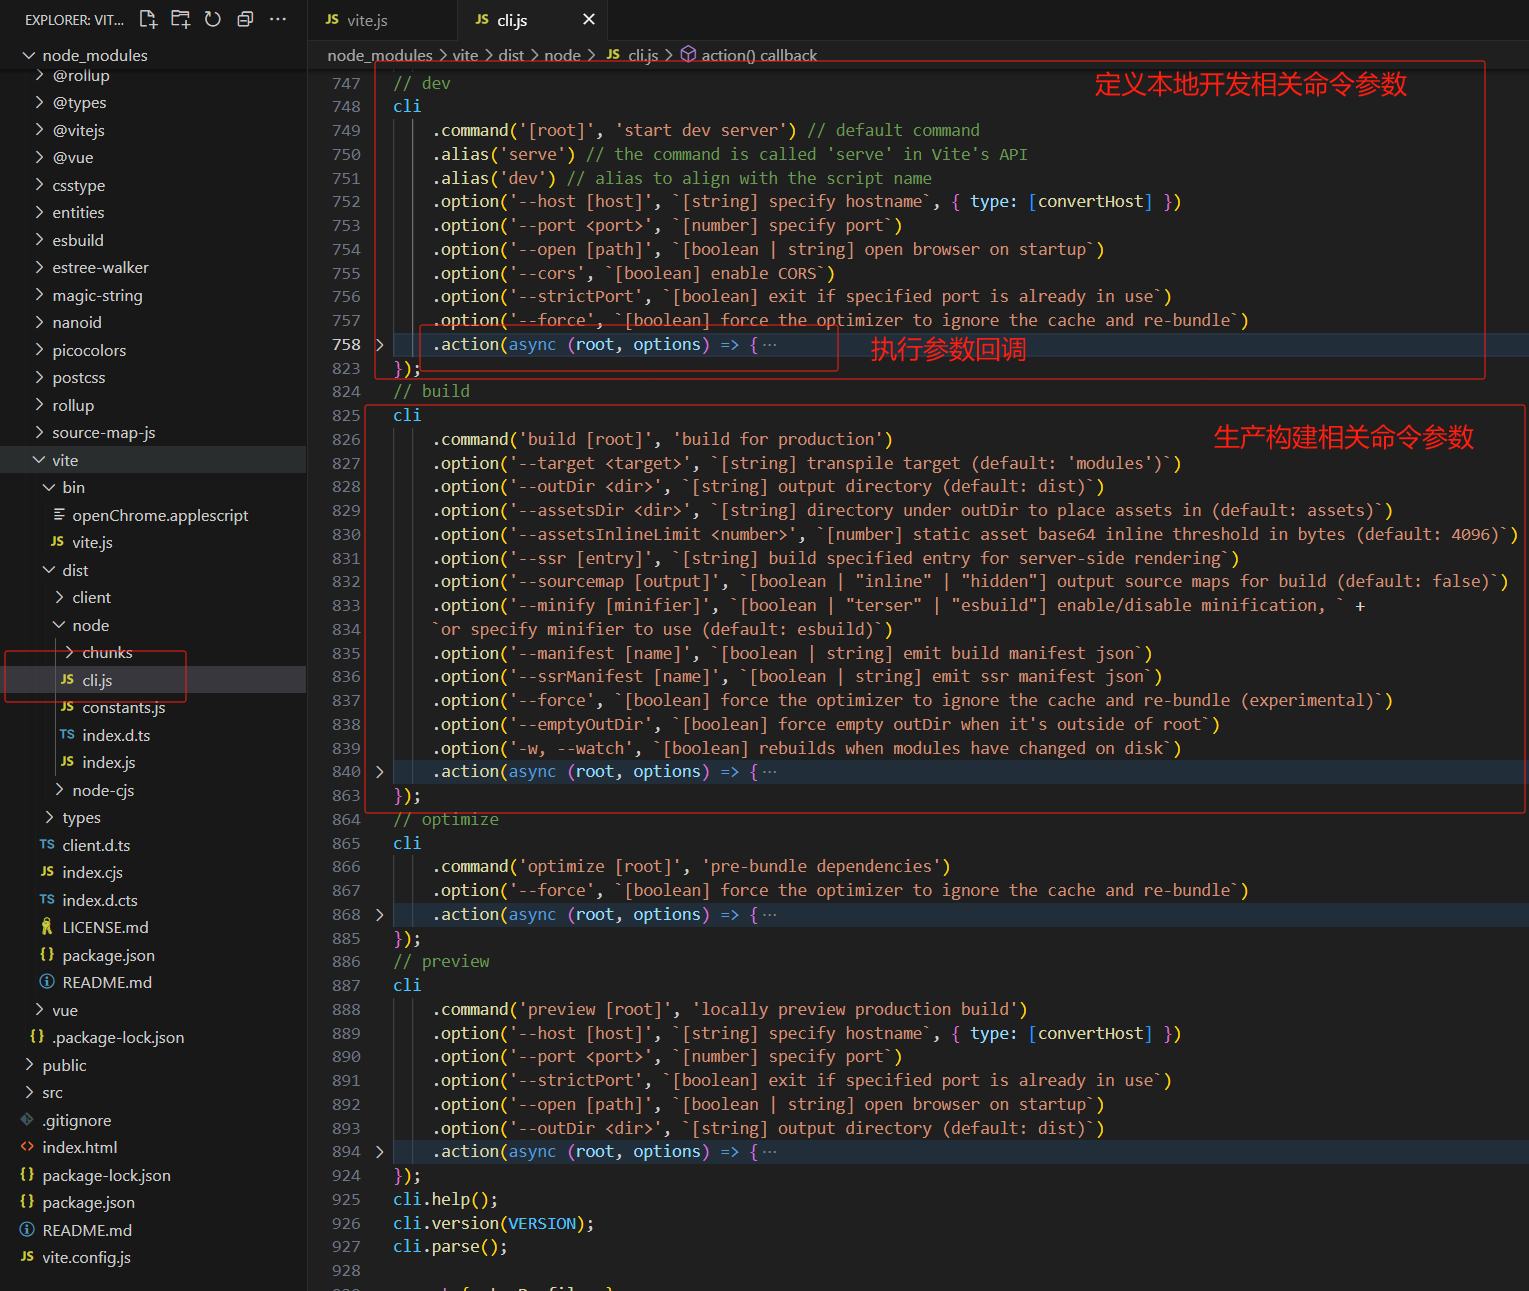
以上文件主要定义了 dev ,build,optimize,preview 命令参数:并在执行对象参数后,执行 cli.command.action 回调。
下面以 dev 和 build 命令解析为例说明 vite 解析过程。
vite 开发和构建服务命令:
{
  "scripts": {
    "dev": "vite", // 启动开发服务器,别名:`vite dev`,`vite serve`
    "build": "vite build", // 为生产环境构建产物
    "preview": "vite preview" // 本地预览生产构建产物
  }
}
在执行 vite dev 和 vite build 命令时,默认会执行 cli.js 文件的回调。
开发服务
vite dev 命令的回调:
async (root, options) => {
    filterDuplicateOptions(options);//过滤重复的选项,确保在创建服务器时使用的是最新的配置。
    //导入Vite服务器创建函数createServer,以及一些额外的配置选项
    const { createServer } = await import('./chunks/dep-9A4-l-43.js').then(function (n) { return n.A; });
    try {
      //使用过滤后的配置选项创建Vite服务器
      const server = await createServer({
        root,
        base: options.base,
        mode: options.mode,
        configFile: options.config,
        logLevel: options.logLevel,
        clearScreen: options.clearScreen,
        optimizeDeps: { force: options.force },
        server: cleanOptions(options),
      });
      //检查服务器是否创建成功,如果没有,抛出错误
      if (!server.httpServer) {
        throw new Error('HTTP server not available');
      }
      //启动服务器监听
      await server.listen();
      const info = server.config.logger.info;//获取日志记录函数info
      const viteStartTime = global.__vite_start_time ?? false;//获取Vite启动时间,如果找不到则设置为false。
      const startupDurationString = viteStartTime//计算启动时间字符串。
        ? colors.dim(`ready in ${colors.reset(colors.bold(Math.ceil(performance.now() - viteStartTime)))} ms`)
        : '';
      //检查标准输出和错误输出是否有数据写入。
      const hasExistingLogs = process.stdout.bytesWritten > 0 || process.stderr.bytesWritten > 0;
      //调用日志记录函数,显示基本信息,并设置clear属性为!hasExistingLogs,表示是否清空屏幕。
      info(`\n  ${colors.green(`${colors.bold('VITE')} v${VERSION}`)}  ${startupDurationString}\n`, {
        clear: !hasExistingLogs,
      });
      //打印服务器URL。
      server.printUrls();
      const customShortcuts = [];
      if (profileSession) {
       // 省略代码...
      }
      server.bindCLIShortcuts({ print: true, customShortcuts });
    }
    catch (e) {
      const logger = createLogger(options.logLevel);
      logger.error(colors.red(`error when starting dev server:\n${e.stack}`), {
        error: e,
      });
      stopProfiler(logger.info);
      process.exit(1);
    }
  }
在 vite dev 回调中主要通过 createServer 方法使用过滤后的配置选项创建Vite服务器。
构建服务
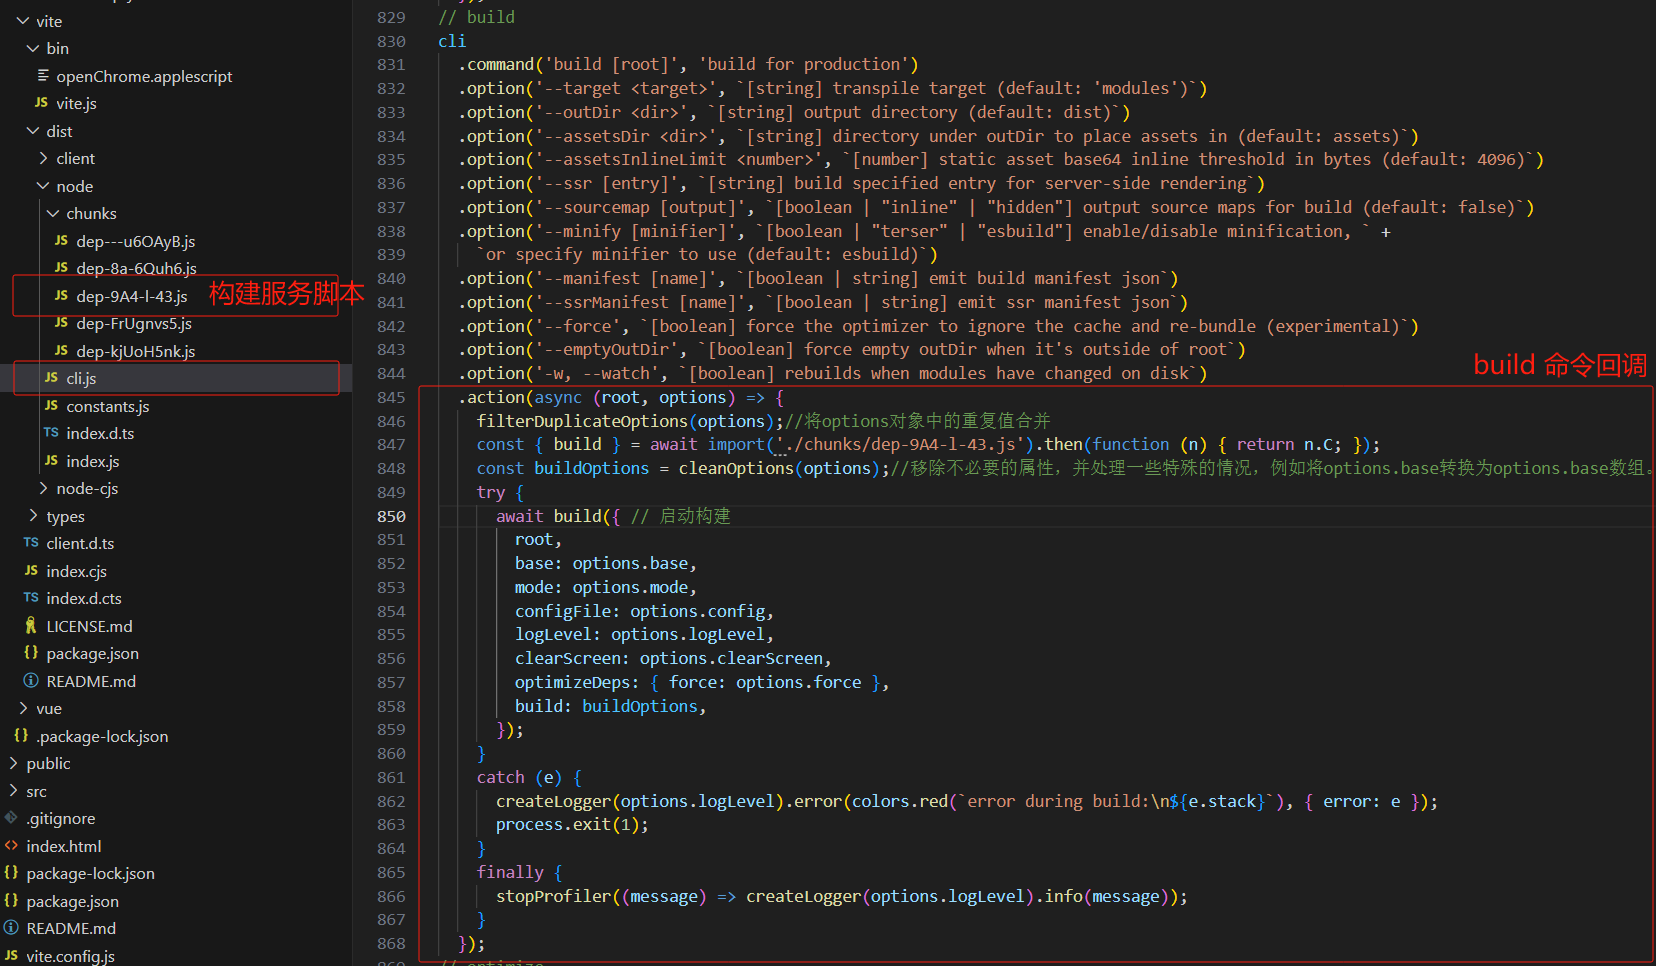
在执行 vite build 命令时,默认会执行 cli.js 文件的回调:
执行
vite build构建命令后,执行以下逻辑:
- 构建参数处理;
- 启动构建
构建方法build在 ./chunks/dep-9A4-l-43.js 文件中定义,定义如下:
/**
 * Bundles the app for production.
 * Returns a Promise containing the build result.
 */
async function build(inlineConfig = {}) {
    //省略代码...
    // 此处为根据构建参数进行各项初始化
    try{
        // write or generate files with rollup
        // 引入 rollup
        const { rollup } = await import('rollup');
        // 使用 rollup 并传入 rollup 选项参数进行构建
        bundle = await rollup(rollupOptions);
        if (options.write) {
            // 输出构建文件
            prepareOutDir(outDirs, options.emptyOutDir, config);
        }
        const res = [];
        for (const output of normalizedOutputs) {
            res.push(await bundle[options.write ? 'write' : 'generate'](output));
        }
        return Array.isArray(outputs) ? res : res[0];
    }
    catch (e) {
        outputBuildError(e);
        throw e;
    }
    finally {
        if (bundle)
            await bundle.close();
    }
}
通过以上代码可以看到,Vite 构建底层是通过 Rollup 来进行构建的!